
Your home’s roof faces an unrelenting combination of challenges that most American homeowners never experience. If you live along Northeast Florida’s coast in St. Johns, Duval, Nassau, or Putnam Counties, your roof faces salt-air corrosion, hurricane-force winds, and intense UV exposure simultaneously. This triple threat destroys roofing materials faster than anywhere else in the country, turning a 30-year roof into a 15-year liability.
This comprehensive guide provides Florida coastal roof protection strategies based on building science, updated code requirements, and decades of field performance data. You’ll learn which materials actually survive Northeast Florida’s climate, what the Florida Building Code requires for your specific location, how wind mitigation inspections can reduce your insurance premiums by up to 45%, and how to find contractors who will still be in business when you need warranty work.
Whether you’re evaluating repair versus replacement, preparing for hurricane season, or selecting materials for a new roof, this guide gives you the knowledge to make informed decisions. By the end of this guide, you’ll understand exactly what destroys coastal roofs, which solutions actually work, and how to take control before the next storm warning appears on your phone. Schedule a free inspection to get an honest assessment of your roof’s condition.
The Hidden Battle Between Your Roof and the Elements
You’re standing in your driveway after another storm warning has passed, looking up at your roof with a knot in your stomach. Is that discoloration new? Were those granules there before? Living along Northeast Florida’s coast means waking up to beautiful ocean breezes and spectacular sunrises. Still, it also means your roof takes a daily beating from elements that most homeowners never have to think about twice.
Your roof doesn’t just sit there looking pretty. Every single day, it’s battling three relentless forces that work together to break it down faster than roofs anywhere else in the country.
The Salt Air Attack
Salt air carries sodium chloride particles that settle on every surface of your roof, particularly targeting metal components like flashing, gutters, and fasteners. This constant exposure triggers electrochemical corrosion, weakening your roof’s structural integrity over time and leading to rust, leaks, and eventual system failure.
Even if you live several miles inland in St. Johns or Nassau Counties, salt particles carried by coastal winds work their way into every crack, seam, and fastener on your roof. According to research from the National Roofing Contractors Association, coastal environments accelerate material degradation by 200 to 300 percent compared to inland locations.
Here’s what salt does to different materials:
Asphalt shingles lose protective granules faster in salt air. As the granules wash away, the asphalt base becomes exposed to direct sunlight and moisture, making it brittle and prone to cracking. The typical 20 to 25-year lifespan of architectural shingles drops to 12 to 18 years in coastal environments.
Metal components require special attention. Aluminum develops a natural oxide coating that provides some resistance to salt air. Galvalume steel combines aluminum, zinc, and silicon coatings for enhanced protection. However, even these materials require proper installation and regular maintenance to prevent premature failure at fastener locations and cut edges.
Flat roofing membranes such as TPO, PVC, and modified bitumen can withstand salt exposure well due to their chemical composition. However, salt accumulation can accelerate degradation of seams and flashings if not regularly maintained. Ponding water mixed with salt residue creates concentrated corrosive conditions that attack metal drains and edge details.
Storm Surge and Hurricane Winds
Florida’s hurricane history isn’t folklore. It’s a blueprint for what your roof needs to survive. The Florida Building Code underwent a comprehensive revision after Hurricane Andrew in 1992, establishing wind-resistance requirements that exceed those of most other states. These standards represent minimum survival thresholds, not optimal performance targets.
According to FEMA documentation on hurricane preparedness, wind damage is among the most common and costly issues for coastal properties. Hurricane-force winds can lift entire roof sections, tear off shingles, bend metal panels, peel back flat roofing membranes, and create openings that allow catastrophic water intrusion.
The danger extends beyond direct wind pressure. Winds exceeding 160 mph generate uplift forces that test every fastener, adhesive bond, and structural connection. Flying debris becomes projectile weapons that puncture roofing materials and shatter unprotected openings.
Your entire roofing system must be engineered for hurricane resistance, from the structural deck attachment to the final cap shingles or ridge details.
Choosing materials based on appearance or initial cost without considering wind resistance is a decision you’ll regret during the next major storm.
Relentless Sun and UV Exposure
Florida’s intense sunlight delivers more UV radiation per square foot than almost anywhere else in the continental United States. UV rays break down the chemical bonds in roofing materials, causing them to crack, warp, and become brittle over time.
According to research compiled by the Department of Energy, roof surface temperatures in Florida regularly reach 150°F to 170°F during the summer months. This extreme heat breaks down adhesives, fades protective finishes, and creates expansion and contraction cycles that stress fasteners and seams.
High humidity compounds the problem. The combination of heat and moisture creates ideal conditions for biological growth. Algae, mold, and mildew colonize roof surfaces, particularly on north-facing slopes and shaded areas. These organisms retain moisture against roofing materials, accelerating decay and creating unsightly discoloration.
The Materials That Actually Survive (And the Ones That Don’t)
Stop asking what’s popular. Start asking what actually works. Here’s the truth about roofing materials in coastal Florida, backed by decades of real-world performance.
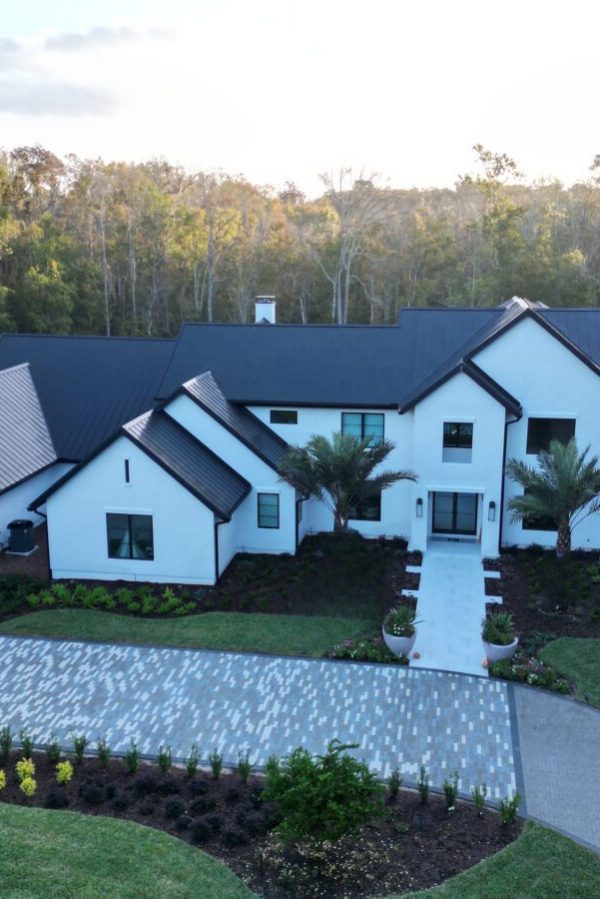
Standing Seam Metal: The Coastal Champion
Standing-seam metal roofing is the gold standard for coastal Florida applications. This material excels at resisting hurricane-force winds, salt corrosion, and UV exposure, while offering exceptional longevity and energy efficiency.
With hidden fasteners, heavy-gauge panels (typically 24 to 26 gauge), and rust-resistant Galvalume or aluminum finishes, standing seam metal handles salt air, 160+ mph winds, and daily sun exposure without significant degradation. Performance specifications include:
- Wind ratings: 165 to 211 mph when properly installed
- Salt resistance: Excellent with Galvalume or aluminum substrate
- Average lifespan: 40 to 70 years in coastal environments
- Cost: $10 to $14 per square foot installed
- Energy efficiency: Reduces cooling costs by 10 to 25 percent
The hidden fastener system eliminates exposed screws that salt can attack. Panels interlock to create a continuous barrier that wind cannot lift from underneath. Metal reflects solar heat instead of absorbing it, keeping your home cooler and reducing energy bills. The National Roofing Contractors Association emphasizes proper installation details, including thermal movement accommodation and corrosion-resistant fasteners, as critical for long-term performance.
Not all metals perform equally in coastal applications. Aluminum stands out as the most corrosion-resistant option, followed by stainless steel and copper. When selecting metal roofing, verify that the coating is PVDF (polyvinylidene fluoride) rather than standard polyester. PVDF coatings provide superior resistance to salt air and UV degradation.
Flat Roofing Systems: Commercial-Grade Protection
Flat and low-slope roofing systems have become increasingly popular for both commercial buildings and modern residential architecture in coastal Florida. These systems offer excellent protection when properly specified and installed for our challenging environment.
TPO (Thermoplastic Polyolefin) has emerged as a leading choice for coastal flat roofs. TPO membranes are heat-welded at seams, creating a monolithic barrier against water infiltration. The white reflective surface reduces cooling costs by 10 to 30 percent. TPO resists UV degradation, ozone exposure, and chemical attack from salt air. Performance specifications include:
- Wind ratings: Up to 150 mph when mechanically attached or fully adhered
- Salt resistance: Excellent; non-metallic membrane unaffected by salt corrosion
- Average lifespan: 20 to 30 years in coastal environments with proper maintenance
- Cost: $6 to $10 per square foot installed
PVC (Polyvinyl Chloride) roofing offers similar benefits to TPO with enhanced chemical resistance. PVC membranes are particularly well-suited for coastal environments because they resist the oils, chemicals, and pollutants often present in marine atmospheres. The material maintains flexibility in Florida’s heat while providing exceptional puncture resistance.
Modified Bitumen provides a proven alternative that combines traditional built-up roofing technology with modern polymer modifications. These systems feature multiple layers that create redundant waterproofing protection. Modified bitumen handles Florida’s thermal cycling well and can be repaired easily if damaged. Cap sheets with reflective granules improve energy efficiency. Expect 15 to 25 years of service life in coastal conditions.
Flat roof systems require meticulous attention to drainage. Florida’s intense rainfall means that ponding water becomes a critical concern. Proper slope (minimum 1/4 inch per foot), adequately sized drains, and regular maintenance prevent premature membrane deterioration and structural damage from water accumulation.
Architectural Asphalt Shingles: Budget-Friendly But Vulnerable
Asphalt shingles represent the most affordable roofing option, which explains their widespread use. However, they’re also the most vulnerable to Florida’s coastal environment. Homeowners choosing asphalt must understand the trade-offs involved.
Asphalt shingle roofs typically last between 12 and 20 years in Florida’s coastal environment. The combination of intense sun, salt air, heavy rain, and hurricanes accelerates wear. Asphalt shingles lose protective granules over time, exposing the base material to UV damage and moisture penetration.
Not all asphalt shingles perform equally. Basic 3-tab shingles offer only 60 mph wind resistance, making them completely inappropriate for hurricane-prone areas. Architectural (laminated) shingles can withstand winds up to 130 mph when properly installed and may last up to 25 years with excellent maintenance.
Suppose you’re choosing asphalt for budget reasons. In that case, you must select architectural shingles with a minimum Class H wind rating, verify the wind rating meets Florida Building Code requirements for your wind zone, ensure proper installation with six nails per shingle, and plan for inspections every six months rather than annually.
For coastal properties, consider architectural shingles a short-term solution rather than a long-term investment. Many of our clients in St. Augustine and Ponte Vedra choose to invest in more durable materials upfront to avoid repeated replacement cycles. Learn more about our residential roofing services.
Composite/Synthetic: The Engineered Alternative
Composite roofing combines aesthetic appeal with engineered performance. These products use advanced polymers to replicate the appearance of natural slate or shake while offering superior resistance to wind, salt, UV radiation, and impact damage.
Composite roof materials are ideal for hurricane-prone areas. They are lightweight and easy to install, carry a Class 4 impact resistance rating (the highest available), and can withstand winds up to 110 mph in standard configurations. Cost typically ranges from $8 to $12 per square foot installed, positioning composite between asphalt and premium metal.
| KEY INSIGHT: Know Your Zone and What It MeansYour location determines your wind zone classification, which directly impacts material requirements. Most Northeast Florida properties fall into the Wind-Borne Debris Region (WBDR) designation, requiring wind resistance to 110 to 140 mph sustained winds. Properties within one mile of the coast may face higher requirements. Check your specific wind zone classification using the Florida Building Commission wind speed maps before selecting materials. |
Florida Building Code Requirements
The Florida Building Code isn’t bureaucratic red tape. It represents accumulated knowledge about what actually keeps roofs on houses during Category 5 hurricanes. Understanding these requirements protects your family and your investment.
Wind Zones and What They Mean
Florida’s roofing code bases requirements on the statistical probability of hurricane-force winds at your specific location. The state uses two primary designations:
The Wind-Borne Debris Region (WBDR) covers most of Florida, where sustained wind speeds range from 110 to 140 mph. This classification covers most properties in Northeast Florida, including Jacksonville, St. Augustine, and surrounding areas. WBDR designation requires impact-resistant opening protection and enhanced attachment requirements for roof coverings.
The High-Velocity Hurricane Zone (HVHZ) is limited to Miami-Dade and Broward counties, where wind speeds exceed 140 mph. HVHZ applies the strictest roofing standards in the nation, requiring products to pass Technical Approval Specifications (TAS) testing for impact resistance and wind uplift.
In Northeast Florida (St. Johns, Duval, Putnam, and Nassau Counties), most homes are designated WBDR. However, your exact distance from the coast affects your specific wind speed requirement. The Florida Building Commission provides detailed wind-speed maps that show requirements down to the individual-parcel level.
Critical Fastener and Connection Requirements
Roof failures during hurricanes often begin with uplift. Wind gets under the edge of shingles or roofing membranes and progressively peels the roof covering away from the deck. This is why Florida code specifies exact fastener requirements.
According to the Florida Building Code, shingles in WBDR zones require a minimum of six nails per shingle (not the standard four used elsewhere), with specific placement patterns that resist both uplift and lateral movement. The deck thickness, fastener length and diameter, and spacing patterns are all evaluated during permitting and inspection.
Florida mandated hurricane ties for all new construction after Hurricane Andrew demonstrated that roofs can separate from wall structures. These metal connectors tie roof trusses or rafters directly to the top plates of walls.
If your home was built before 1992, it likely lacks adequate roof-to-wall connections. Retrofitting hurricane straps to an existing home typically costs $1,000 to $1,500, depending on home size. According to wind mitigation research from the Insurance Institute for Business & Home Safety, proper roof-to-wall connections reduce the risk of catastrophic roof failure by 65 to 80 percent during major hurricanes.
Recent Code Updates
The Florida Building Code updates every three years. The 8th edition, implemented from 2023 to 2024, modified the rules on the 25 percent damage threshold. For homes built after March 2009, you can repair damaged sections rather than replacing the entire roof when damage exceeds 25 percent of the total roof area. Homes built before March 2009 with no prior roof replacement still require complete replacement if damage exceeds 25 percent.
This change can save thousands of dollars if you have a newer roof that meets current code standards. However, you must maintain documentation showing when your roof was built or last replaced. Keep permits, invoices, and inspection reports in a fireproof safe or in the cloud.
All roof work requires building permits and inspections at multiple stages. Never skip permits to save money or time. Unpermitted work complicates insurance claims, creates liability during home sales, and may result in forced removal and replacement at your expense if discovered later.
Wind Mitigation Insurance Discounts
Here’s money sitting on the table that most Northeast Florida homeowners never pick up. Wind mitigation inspections can slash your insurance premiums, often paying for themselves within the first year.
What Wind Mitigation Actually Is
The State of Florida requires insurance companies to offer discounts for protecting your home against windstorm damage. These discounts, known as wind mitigation credits, recognize that homes built or upgraded to withstand hurricane-force winds sustain less damage and generate fewer insurance claims.
To qualify for these discounts, a certified inspector must perform a wind mitigation inspection of your home. According to the Florida Department of Financial Services, most wind mitigation inspections result in savings that cover the inspection cost in the first year and continue saving money every year thereafter.
A typical wind mitigation inspection takes 45 to 60 minutes and costs approximately $125 to $175. This small investment frequently generates annual savings of $300 to $800 or more, depending on your home’s features and your insurance company’s discount schedule.
The Six Features Inspectors Evaluate
Wind mitigation inspections evaluate six specific categories:
Roof Shape: Hip roofs receive significantly less wind pressure than gable roofs. Hip roofs slope on all four sides, eliminating the flat gable ends where wind creates maximum uplift pressure. According to research from the Insurance Institute for Business & Home Safety, hip roofs reduce wind damage risk by 40 to 60 percent compared to gable designs.
Roof Covering: The year your roof was installed and the specific products used determine qualification. Roofs installed after March 1, 2002, should use materials tested to resist uplift from 110 mph winds or higher. You’ll need documentation proving the installation date and product specifications.
Roof Deck Attachment: How your roof decking attaches to the supporting structure significantly impacts wind resistance. Enhanced attachment patterns (8d nails at 6 inches on center along panel edges) receive the best discount levels.
Roof-to-Wall Connection: This evaluates how your roof trusses or rafters connect to your home’s walls. Hurricane clips, ties, or single wraps receive the highest credits. Toenails receive minimal credit.
Secondary Water Resistance (SWR): SWR provides additional protection from water damage when the typical roof covering fails during wind and hail storms. Sealing the roof deck requires either a continuous self-adhering membrane or tape at all panel seams.
Opening Protection: All windows, doors, and other openings must have protection from wind-borne debris. This includes impact-resistant glass, storm shutters, or impact-resistant garage doors.
Potential Savings
According to data compiled by the Insurance Information Institute, homeowners can save up to 85 percent on the windstorm portion of their insurance policy by qualifying for all available discounts. More realistically, most Northeast Florida homeowners save 20 to 45 percent of their wind premiums.
The average statewide discount is approximately 30 percent of wind coverage premiums. For a home with a $3,000 annual premium, where wind coverage accounts for 60 percent of the total, a 30 percent wind discount saves $540 annually. Over 10 years, that’s $5,400 in savings from a $150 inspection.
Follow this process: Schedule an inspection with a licensed inspector, gather documentation including building permits and roof installation invoices, submit the completed form to your insurance company, and request a re-inspection after any roof upgrades.
| KEY INSIGHT: Inspection Checklist in 90 Seconds Before your wind mitigation inspection, prepare: (1) Roof installation permit and invoice with product specifications, (2) Building permit for original construction, (3) Previous inspection reports if available, (4) Insurance policy declarations page. Clear access to your attic and garage. This preparation helps inspectors complete accurate assessments and may uncover qualifying features that aren’t immediately visible. |
Professional Inspection Essentials
Professional inspections form the foundation of effective Florida coastal roof protection. Understanding when you need an inspection and what inspectors evaluate can prevent minor issues from becoming catastrophic failures.
When to Schedule Inspections
Schedule professional inspections at these critical intervals:
Twice annually: Inspect in early May (before hurricane season) and late November (after hurricane season ends). These semi-annual inspections catch developing problems before they worsen.
After every named storm: Even if you don’t observe obvious damage, have your roof inspected after any tropical storm or hurricane within 50 miles of your location. Hidden damage may not leak immediately, but it creates vulnerabilities during the next storm.
Before selling: Most home buyers in coastal Florida require current roof inspections as a condition of purchase. Identifying and addressing issues before listing prevents negotiations from stalling.
For roofs over 10 years old, annual inspections become critical once your roof reaches the halfway point of its expected lifespan.
Schedule a roof inspection to ensure your roof provides reliable protection year-round.
What Inspectors Evaluate
Licensed inspectors assess your entire roofing system. A comprehensive inspection includes:
Surface conditions: Missing, cracked, curled, or damaged shingles. Granule loss on asphalt shingles. Rust or corrosion on metal components. Membrane blistering, punctures, or seam separation on flat roofs. Biological growth indicates moisture retention.
Flashing integrity: Flashing around chimneys, skylights, vents, valleys, and roof edges is the most common source of leaks. Inspectors check for rust, separation, improper installation, or sealant failure.
Fastener conditions: Exposed fasteners must be examined for rust, looseness, or missing caps. In concealed fastener systems, inspectors look for panel movement or seam separation.
Structural issues: Sagging, uneven planes, or visible deflection may indicate potential structural problems resulting from inadequate design, water damage, or hurricane damage.
Attic evaluation: Inspectors enter your attic to check for daylight penetration, water stains, mold growth, inadequate ventilation, and proper deck attachment.
Drainage assessment: Gutters, downspouts, and roof drainage must function properly to move water away from your home. On flat roofs, inspectors verify proper slope and drain functionality.
Monthly Walk-Around Inspections
Between professional inspections, perform a 10-minute monthly walk-around looking for these warning signs:
Missing, cracked, or curling shingles. Dark streaks indicate algae growth—rust stains below metal components. Granules are accumulating in gutters. Gaps or separations in flashing around chimneys and vents. Sagging ridgelines or uneven planes. Water stains on ceilings or walls inside your home.
After significant storms, perform an additional walk-around within 24 hours. Keep a simple log noting dates, observations, and photos. This documentation proves valuable for insurance claims and helps you identify deterioration trends.
Proactive Maintenance That Works
You wouldn’t skip oil changes and wonder why your engine died. Your roof needs the same preventive approach. Proactive maintenance extends roof life and prevents emergency repairs.
Simple Maintenance Tasks
Regular rinsing: Monthly rinsing removes salt residue before it hardens and traps moisture against roofing materials. Focus on metal components, including flashing, gutters, and fasteners. Use a garden hose with moderate pressure rather than a pressure washer. Monthly rinsing reduces visible salt accumulation by approximately 30 percent.
Gutter maintenance: Clean gutters and downspouts at least twice annually, more frequently if you have overhanging trees. Clogged gutters cause water to back up under shingles and accelerate wood rot. Install gutter guards appropriate for your tree coverage to reduce cleaning frequency.
Tree trimming: Keep branches at least six feet away from your roof surface. Overhanging branches drop debris that clogs gutters and retains moisture. They create shade that promotes the growth of moss and algae. During storms, they become battering rams and projectiles.
Attic ventilation check: Good attic ventilation prevents moisture buildup under your roof. Proper ventilation also regulates temperature, protecting shingles from premature breakdown caused by excessive heat. The National Roofing Contractors Association recommends one square foot of ventilation for every 150 square feet of attic space.
Seal inspection: Walk around your home twice a year, inspecting sealant around vents, skylights, and chimneys. Sealants degrade over time, particularly under UV exposure. Re-sealing costs $50 to $100 per penetration but prevents leaks that cause thousands in interior damage.
Flat roof drain maintenance: For flat roofing systems, inspect drains monthly during rainy season. Remove debris from drain baskets and scuppers. Verify that water drains within 48 hours after rainfall. Ponding water accelerates membrane deterioration and creates excessive structural loads.
Protective Coatings
Specialized coatings, including elastomeric, acrylic, silicone, or PVDF formulations, protect roofing surfaces from salt-bearing air and accelerated deterioration. These coatings act as a sacrificial barrier, dramatically slowing corrosion and extending service life.
Application frequency depends on your specific product and your proximity to the coast. Generally, recoat every 3 to 5 years for maximum protection in direct coastal environments. This relatively small investment (typically $500 to $1,500) can add 5 to 10 years to your roof’s lifespan.
For flat roofs, reflective coatings provide dual benefits: extending membrane life while reducing cooling costs. Silicone coatings are particularly effective in Florida because they resist ponding water and maintain flexibility through extreme temperature swings.
Documentation
Keep detailed records of all maintenance activities, including dates, descriptions, photos, receipts, observations, and weather events. This documentation provides a maintenance history for home buyers and insurance adjusters. It helps you identify deterioration trends before they become emergencies and validates warranty claims if problems develop.
Store maintenance records in cloud storage or a fireproof safe along with your installation documents, permits, and warranties.
Finding a Trustworthy Contractor
This is where most homeowners get burned. You can select perfect materials and design, but if installation is sloppy or the contractor vanishes, none of it matters.
Red Flags to Avoid
Door-to-door solicitation after storms is a major warning sign. Legitimate contractors with good reputations don’t chase work door-to-door. Storm chasers follow hurricanes into town, perform hasty work, collect payment, and disappear before problems emerge.
Pressure to sign immediately indicates manipulation. Quality contractors understand that roofing is a major investment that requires thoughtful consideration. They provide detailed written estimates and give you time to review and compare.
Requests for full payment up front violate standard practice. A proper payment structure involves a small deposit (10 to 20 percent), progress payments as work reaches defined milestones, and a final payment upon completion.
No physical address or local presence is concerning. You want a company with a permanent office, established reputation, and long-term presence in Northeast Florida. Contractors who provide only a cell phone number often disappear when problems arise.
Prices significantly below other estimates signal problems. If one estimate is 30 to 40 percent below others, the contractor may be cutting corners, using substandard materials, or lacking proper insurance.
Essential Questions to Ask
Before signing contracts, get clear written answers to these questions:
Licensing and insurance: What’s your Florida contractor license number? (Verify at MyFloridaLicense.com). Can I see the current certificates of general liability and workers’ compensation insurance?
Experience and expertise: How many coastal roofs have you completed in Northeast Florida in the past three years? Can you provide references from projects in St. Johns or Duval Counties completed in the last 2 years?
Project specifics: What products will you use, including manufacturer names and model numbers? Will you pull permits and arrange required inspections? What’s your typical timeline from project start to completion?
Communication: Who will be my primary point of contact? How often will you provide progress updates? What happens if I’m not satisfied with any aspect of the work?
Document all answers in writing. Professional contractors welcome detailed questions and provide thorough written responses.
Understanding Warranties
Two separate warranties protect your investment:
Material warranties are issued by manufacturers and cover product defects. These warranties typically last 20 to 50 years. However, material warranties don’t cover installation errors, only manufacturing defects.
Workmanship warranties issued by contractors cover installation errors that cause leaks or failures. Quality contractors offer a minimum 5-year workmanship warranty, with many providing 10-year coverage.
Get both warranties in writing before work begins. Understand what voids each warranty and what maintenance you’re responsible for.
Local Expertise Matters
A contractor from Orlando, Tampa, or out of state might hold proper licenses and demonstrate general competence. However, they don’t understand the specific challenges of Northeast Florida. You want someone who knows the local building department requirements, how St. Johns County codes differ from Duval County codes, which material suppliers reliably serve the area, and regional architectural styles.
At HW Contracting, we’ve served St. Johns, Duval, Putnam, and Nassau Counties for years because this is our home. We understand the unique challenges of coastal roofing in Northeast Florida. Learn more about our team and approach.
When comparing estimates, don’t automatically select the lowest price. Compare total value using materials specified, scope of work, warranty terms, timeline, insurance and licensing, references, and reputation from sources like the Better Business Bureau, as well as written details.
Understanding Insurance Claims
Most homeowners learn about insurance claims the hard way. Let’s change that by understanding the process before you need to file a claim.
RCV vs ACV: Critical Difference
Your homeowners’ policy covers your roof using one of two methods:
Replacement Cost Value (RCV) pays to replace damaged materials with new materials of similar quality, without depreciation deductions. This is what you want.
Actual Cash Value (ACV) pays the depreciated value based on age and condition. If your 15-year-old shingle roof gets destroyed, you might only receive 40 percent of the replacement cost.
Check your policy declarations page right now. If you have ACV coverage, call your insurance agent about upgrading to RCV. The premium difference is typically modest compared to the potential difference in claim payout.
What Policies Don’t Cover
Standard homeowners’ policies provide coverage for wind damage from hurricanes, including damage to roofs, siding, windows, garages, and other structures. However, standard policies do not cover damage from flooding.
Storm surge, tidal flooding, and groundwater intrusion require separate flood insurance, typically provided through the National Flood Insurance Program. If you live in a flood zone or within several miles of the coast, obtain flood insurance quotes.
Hurricane Deductibles
Most coastal Florida homeowners’ policies include separate hurricane deductibles that typically range from 2 to 10 percent of your home’s insured value. For a home insured for $300,000 with a 5 percent hurricane deductible, you’ll pay the first $15,000 of repairs.
Hurricane deductibles typically apply when the National Weather Service declares a hurricane watch or warning for your area. Understanding your hurricane deductible helps you make informed decisions about filing claims.
The Claims Process
After damage occurs, take these immediate actions:
Document everything with photos and video before making any repairs. Make temporary repairs to prevent further damage (tarps, boarding up openings). Keep all receipts for emergency materials and labor. Contact your insurance company within 24 to 48 hours. Don’t sign anything with contractors claiming they can guarantee a claim payout.
Be present when the adjuster inspects your property. Point out all damage, even seemingly minor issues. Ask questions and take notes. Request a copy of the adjuster’s report. Don’t accept the first offer if it seems inadequate.
Common claim issues include cosmetic versus functional damage disputes, age and depreciation arguments, matching replacement materials for partial damage, and code upgrade coverage.
Documentation Importance
Before storm season, create a comprehensive roof documentation file that includes current photos from all angles, a copy of the installation invoice and materials list, all maintenance records and receipts, the wind mitigation inspection report, warranty documents, and the insurance policy declarations page.
This documentation proves the condition and value of your roof before damage occurred, strengthening your claim. According to the Insurance Information Institute, homeowners with thorough documentation receive claim settlements 30 to 40 percent faster.
If you experience storm damage, our team can help you navigate the insurance process. Learn more about our storm damage services in Ponte Vedra.
Repair vs Replace Decision
You’ve discovered damage. Now what? This decision involves more than comparing immediate costs. Consider long-term value and total cost of ownership.
When Repair Makes Sense
Repair is appropriate for limited, localized damage, such as a small section damaged by a fallen branch, a few missing shingles after moderate winds, or an isolated leak from damaged flashing.
Roofs less than 5 years old, in good overall condition, with damage not exceeding 25 percent of the total area, are typically good repair candidates. Verify that matching materials remain available.
Emergencies requiring immediate fixes may dictate repairs even when replacement would be preferable in the long term. A quality repair can reliably last 3 to 5+ years, giving you time to plan and budget for eventual replacement.
When Replacement Is Right
Roofs approaching or exceeding the expected lifespan for their material type should be replaced rather than repeatedly repaired. Widespread granule loss, curling, brittleness, or multiple previous repairs indicate that the roof has reached the end of its life.
If you’re planning to stay in your home 10+ more years, replacement makes more financial sense than a series of repairs. New roofs typically return 60 to 70 percent of cost at resale, with higher returns in coastal markets.
If your current roof doesn’t meet modern wind-resistance standards or insurance requires specific upgrades, replacement offers the opportunity to improve performance dramatically.
For older homes built before March 2009, the Florida Building Code requires full replacement when damage exceeds 25% of the roof area.
True Cost Analysis
Don’t just compare today’s check amounts. Calculate total cost over time:
| Repair scenario: $5,000 repair today. Likely needs an additional $3,000 to $5,000 repair in 3 to 5 years. Full replacement required in 5 to 7 years for $20,000 to $30,000. Total cost over 7 years: $28,000 to $40,000. Annual cost: $4,000 to $5,700. |
| Replacement scenario: $20,000 replacement today. Minimal maintenance for 15 to 20 years (perhaps $2,000 total). Total cost over 20 years: $22,000. Annual fee: $1,100. |
Additional factors include insurance impact (replacement qualifies for wind mitigation discounts worth $300 to $800 annually), resale value (new roof adds $10,000 to $15,000 in coastal markets), warranty coverage (replacement provides 20 to 50 years material warranty plus 5 to 10 years labor warranty), energy efficiency (new roof can reduce cooling costs by 10 to 25 percent), and future repair frequency.
A repair might cost $5,000 today but require another $5,000 in three years, then full replacement in five years. Meanwhile, a $20,000 replacement provides 30+ years of protection with minimal maintenance, lower insurance premiums, and higher resale value.
Questions for Your Contractor
When evaluating repair versus replacement, ask: What’s the realistic remaining lifespan after this repair? What’s the probability of needing additional repairs in the next 3 to 5 years? How does the current roof condition compare to the current code requirements? What warranties would apply to repair work? What would the replacement cost be, and what would that include? How would replacement affect my insurance premiums?
An honest contractor prioritizes your long-term interests. Our team provides honest assessments to help you make informed decisions. Explore our residential roofing services to learn more.
| KEY INSIGHT: Post-Storm First 24 HoursAfter the storm passes: (1) Document all damage with photos and video before making repairs, (2) Make temporary repairs to prevent further damage, keeping all receipts, (3) Contact your insurance company within 24 to 48 hours, (4) Beware of contractors who appear immediately after storms without established local presence, (5) Verify credentials through MyFloridaLicense.com and Better Business Bureau. |
Hurricane Season Action Plan
Hurricane season officially runs from June 1 through November 30, but your preparation should start much earlier. This action plan ensures your roof is ready.
Three Months Before (March to April)
Schedule a professional inspection to identify any vulnerabilities. Schedule appointments early, as contractor calendars fill up as summer approaches. Complete identified repairs before June. Contractor schedules become packed as hurricane season approaches.
Review insurance coverage. Confirm you have adequate dwelling coverage, understand your hurricane deductible, verify wind mitigation credits are properly applied, and confirm replacement cost value for your roof. Add flood insurance if you don’t have it (remember the 30-day waiting period).
Document the current condition with comprehensive photos and video of your entire roof, exterior property, and interior rooms. Store copies in cloud storage.
One Month Before (May)
Trim trees by removing dead branches and trimming any branches within 10 feet of your roof. According to NOAA hurricane preparedness guidelines, trees and flying debris cause substantial damage during hurricanes.
Clean gutters and drains to ensure water can flow freely. Check downspout extensions and grade around your foundation.
Inspect and secure roof penetrations, including all vents, skylights, and chimneys. Ensure flashing is secure and sealant is intact.
Stock emergency supplies including heavy-duty tarps and plastic sheeting, plywood sheets for emergency repairs, battery-powered tools, rope, nails, screws, duct tape, generator and fuel if applicable, and chainsaw with safety equipment.
When a Storm Approaches
72 hours before: Move outdoor furniture and loose items inside. Close and lock all windows and doors. Install storm shutters or board up windows. Fill bathtubs with water. Charge all devices. Review evacuation routes.
48 hours before: Photograph the property again for insurance documentation. Turn the refrigerator and freezer to the coldest settings. Fill vehicle gas tanks. Withdraw cash. Secure important documents.
24 hours before: Final walk-around inspection and documentation. Turn off utilities if instructed to evacuate. Move vehicles to higher ground. Evacuate if advised by authorities.
Never: Make roof repairs during the storm. Go outside during the eye of the storm. Assume the storm is over until the official all-clear is given. Touch downed power lines.
After the Storm
Don’t access your roof until authorities confirm safety. Watch for downed power lines, weakened structures, and contaminated water.
Document damage immediately with photos and video before making any repairs. Make temporary repairs to prevent further water intrusion. Contact your insurance company within 48 hours. Beware of storm chasers who appear immediately without an established local presence.
Frequently Asked Questions About Florida Coastal Roof Protection
How long should a roof last in coastal Florida?
The lifespan of roofs in coastal Florida depends primarily on material selection and maintenance quality. Asphalt shingles typically last 12 to 20 years in coastal environments compared to 20 to 30 years inland. Metal roofing lasts 40 to 70 years when properly maintained. Properly installed flat roofing systems with mechanical attachment or full adhesion can also achieve excellent wind ratings up to 150 mph.
The combination of salt air, intense UV exposure, and hurricane conditions reduces expected lifespan by 30 to 50 percent compared to less challenging climates. Regular maintenance, including semi-annual inspections and monthly rinsing, can extend your roof toward the upper end of these ranges.
What is the most hurricane-resistant roofing material?
Standing seam metal roofing provides the best hurricane resistance when properly engineered and installed. These systems achieve wind ratings of 165 to 211 mph through concealed fastener systems and interlocking panels. Properly installed flat roofing systems with mechanical attachment or full adhesion can also achieve excellent wind ratings up to 150 mph. However, the Florida Building Commission emphasizes that proper installation matters more than material selection. Any roofing material can provide adequate hurricane protection when installed in accordance with the Florida Building Code.
How much does wind mitigation save on insurance?
Wind mitigation inspections in Northeast Florida typically generate insurance premium savings of $300 to $800 annually for homes that qualify for most available discounts. According to the Insurance Information Institute, the average statewide discount is approximately 30 percent of the windstorm portion of annual premiums. Actual savings depend on your home’s specific features and insurance company discount schedules. The wind mitigation inspection costs $125 to $175 and typically pays for itself within 6 to 12 months. These savings continue every year your qualifying features remain in place.
What does the Florida Building Code require for coastal roofing?
The Florida Building Code establishes minimum requirements based on your wind zone. Most Northeast Florida properties fall into the Wind-Borne Debris Region, requiring wind resistance to 110 to 140 mph. Specific requirements include a minimum of 6 nails per asphalt shingle, impact-resistant opening protection, a secondary water-resistance barrier over the entire roof deck, enhanced roof-to-wall connections using hurricane ties, proper deck attachment with specific fastener spacing, and flashing meeting wind-driven rain testing standards. All work requires building permits and inspections at multiple stages.
How often should I have my roof inspected?
Professional roof inspections should occur at a minimum of twice annually in coastal Florida. Schedule inspections in early May, before hurricane season, and in late November, after hurricane season ends. Additionally, schedule professional inspections after any named tropical storm or hurricane within 50 miles, even if there is no visible damage. Roofs over 10 years old benefit from more frequent inspections. Between professional inspections, perform monthly walk-around visual inspections looking for missing shingles, rust stains, membrane damage, and biological growth.
Can I install a new roof over existing shingles in Florida?
The Florida Building Code generally permits installing one layer over one existing layer when certain conditions are met. However, this practice is rarely recommended in coastal environments. Installing over existing materials traps moisture, accelerates degradation, and prevents inspection of the deck condition. Most importantly, warranties from quality manufacturers require installation over a clean deck. Installing over old shingles voids material warranties. For coastal Florida properties, always remove existing materials, thoroughly inspect and repair the deck, and properly install new systems.
What should I do if I notice a roof leak during hurricane season?
If you discover a roof leak during hurricane season, contain interior damage with buckets and towels. Never access your roof during storms. After weather conditions allow safe access, take detailed photos documenting the leak location and interior damage. Make temporary emergency repairs using tarps secured with boards. Contact your insurance company within 24 to 48 hours. Contact a licensed roofing contractor for emergency evaluation. Keep all receipts for emergency materials and services. Don’t make permanent repairs until your insurance adjuster has inspected, unless further damage is imminent.
Your Next Steps: Taking Control Today
You’ve reached the end of this guide with comprehensive knowledge about Florida coastal roof protection. You understand what destroys coastal roofs, which materials survive, what codes require, and how to find trustworthy contractors.
Your 30-Day Action Plan
Week 1: Conduct a visual inspection of your roof from ground level and inside your attic. Locate and review your homeowners’ insurance policy. Determine your roof’s age and the date of its last replacement. List any obvious problems requiring professional evaluation.
Week 2: Schedule a professional roof inspection. Request a wind mitigation inspection if you’ve never had one. Contact your insurance agent to discuss improvements to your coverage. Research 2 to 3 local roofing contractors and verify licenses through MyFloridaLicense.com.
Week 3: Meet with contractors for detailed assessments. Request detailed written estimates including specific products, warranties, and timelines. Ask about financing options. Verify all licenses and insurance certificates.
Week 4: Compare estimates focusing on total value. Check references from recent projects. Review and understand all contract terms before signing. Schedule work for optimal timing (October through November or February through April).
Don’t Wait for Disaster
The worst time to need a new roof is after a storm, when contractors are overwhelmed, prices spike, and quality suffers. The best time is right now, when you can make informed choices on your timeline.
Your roof protects your family every single day. Make sure it is capable of performing that critical job.
Partner with Local Experts
At HW Contracting, we’ve built our reputation as the contractor Northeast Florida homeowners trust long after installation. We serve St. Johns, Duval, Putnam, and Nassau Counties because this is our home. We understand the unique challenges of coastal roofing in this region, and we’re committed to solutions that last for decades.
Whether you need an honest assessment, help navigating insurance claims and building codes, or a roof that will protect your family through the next 20 hurricane seasons, we’re here to provide expert guidance and quality workmanship.
Contact HW Contracting
Serving Northeast Florida’s Coastal Communities
Service Areas:
- St. Johns County: St. Augustine, Ponte Vedra, Nocatee, Vilano Beach
- Duval County: Jacksonville, Atlantic Beach, Neptune Beach, Jacksonville Beach
- Nassau County: Fernandina Beach, Yulee, Amelia Island
- Putnam County: Palatka, Crescent City, Interlachen
Our Services:
Schedule your free inspection today for an honest assessment of your roof’s condition and a detailed estimate for repairs or replacement.
Emergency Services Available: 24/7 emergency response for storm damage and urgent repairs throughout Northeast Florida.
Your roof is the shield between your family and everything Florida’s coastal environment can deliver. Make it a strong one.
